LATEST RELEASE: BetaMatch version 3.4.0 - Get it here!

New
From version 3.3 a previous recorded sweep is included. This sweep can be viewed by simply starting the VNA Sweep in the demo version and versions of BetaMatch whithout the VNA Connection Option.
With the “VNA Connection Option” enabled BetaMatch can now be connected to certain network nalayzers (VNA) [1].
This improves the work flow, which allows for significantly shortened design time and improved design quality. Now it is possible for the antenna engineer to tune the antenna and optimize the matching network at the same time!
The connection is via the LAN-port, either direct PC to VNA or over the local network. This allows for a simple set-up that can use any PC (no need for a dedicated computer).
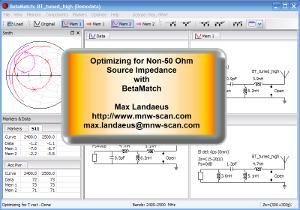
While Running the VNA Sweep BetaMatch is used in the normal way, but will operate on data that is continuously collected from the VNA. Matching and optimizing works as usual and it is possible to see the results of applying any matching network to the trace data while it is sampled. Other operations such as changing the source impedance, reading marker data and comparing with memory data is also fully working.
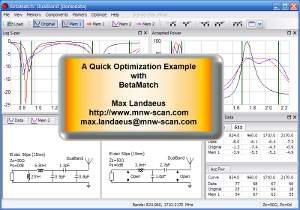
All plots will also work and be updated in real time. They can be resized and moved anywhere on the screen. Display of linked cursor data together with tables with marker values makes it easy to read any values and to compare with the unmatched data and any data in memory. Since the display of many VNA’s is small and not very flexible this is a clear improvement of the working environment.
There is also a function to save the current data-trace (with matching) as a 1-port Touchstone file. This is also an improvement since saving of data in Touchstone format is not a user-friendly procedure on some VNA’s. In addition the file will not be on the VNA but on the computer instead - which is where you want it!
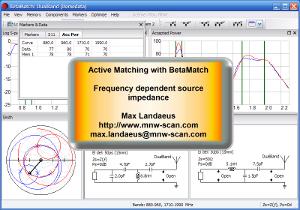
With Continuous Optimization it is also possible to optimize the sampled data live (the optimizer will actually calculate the best matching network for each sweep). This is implemented for 2-, 3- and 4-component matching networks. See below for a snippet where BetaMatch continuously optimizes the matching network as the data is sampled:
Note
The possibility to connect to a VNA is an additional option that needs to be installed separately. This option is not available in the standard distribution or the demo version of BetaMatch.
In the standard version and in the demo version a demonstration sweep is available. In these versions the demo sweep will automatically start when the VNA Sweep is started.
In versions with the VNA Option enabled the demonstration sweep can be selected by ticking VNA -> Playback Sweep before starting the VNA Sweep. To use the normal VNA connection instead simply untick the Playback Sweep option and start the sweep.
The connection between BetaMatch can either be done over a local network or directly PC to VNA via the LAN-port.
If you connect over a network you need make sure that the VNA is connected to the network and you need to find the IP-address of the VNA.
To connect directly PC <–> VNA you will need either a cross-over LAN-cable or if either the PC or the VNA has auto-MDIX you can use a normal LAN-cable instead.
To set it up you connect the PC to the VNA via the cable and on the PC you find the IP-address of the VNA (eg by calling “ipconfig /all” from the DOS prompt).
You may have to adjust the settings on your VNA in order for it to accept connections and to be controlled via the LAN-port. Some VNA’s may need a reboot for the changes to take effect. See the documentation of your VNA [2].
Once a connection between the computer and the VNA is established it is time to tell BetaMatch how to connect to the VNA.
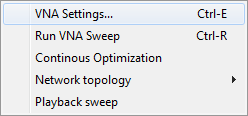
The VNA can be controlled either from the
VNA Menu that is located between the Optimize and Tools menus.
the two VNA-buttons in the toolbar. These controls will only be present if the VNA-option is available.
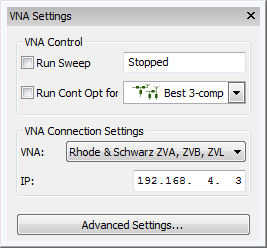
To establish a connection open the ‘VNA Settings Window’ (VNA –> VNA Settings...):
In VNA Connections settings select the VNA-model you have from the choice-list and enter the IP-address of the VNA.
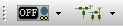
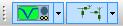
The easiest way to start and stop the sweep is from the VNA-button in the toolbar:
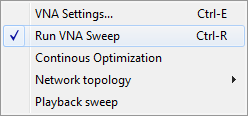
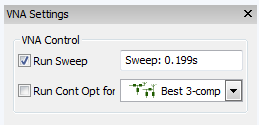
The sweep can also be started from the VNA Menu, the tick box ‘Run Sweep’ in the VNA Settings Dialog or via keyboard short-cut <ctrl-R>:
There is also a dropdown menu in the Start/Stop sweep button:
BetaMatch will continue to work as normal when the sweep is running. It is for instance possble to:
In addition you can save the trace data with matching network (File –> Save data with matching network as 1-port Touchstone). To save the raw trace data reset the matching network first (see Context Menu).
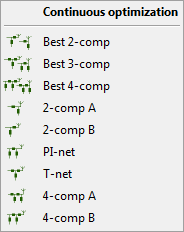
BetaMatch can automatically optimize the matching network at the same time as data is collected from the network analyzer. This is called Continuous Optimization”. This “on-the-fly” optimization can be done for 2-, 3- or 4-component networks.
The desired network type is selected from a menu:
This menu is available from the VNA Menu or from the VNA Settings Dialog or from the Continuous Optimization Button in the VNA-toolbar.
The target frequency bands must be set before you start the continuous optimization (see Setting Marker Frequencies).
Continous optimization can then be started and stopped from the right button in the VNA Toolbar:
Alternatively the continuous optimization may be started from the VNA Menu or the VNA Settings Dialog.
Footnotes
| [1] | Currently the connection BetaMatch to VNA works with the Agilent ENA series and with the ZVA, ZVB and ZVL models from Rhode & Schwarz. However, any VNA that can be controlled over the LAN-port is a potential candidate for the “VNA Connection Option” - please contact info@mnw-scan.com if you wish to test other models. |
| [2] | You can contact info@mnw-scan.com if you have problems setting up the connection, and we will try to guide you through the process. |