LATEST RELEASE: BetaMatch version 3.4.0 - Get it here!

In order to find the best possible matching network BetaMatch comes with a built-in optimizer. The optimization are performed with respect to the Accepted Power into the Antenna. The optimizer will maximize the minimum accepted power within the given frequency bands.
Since all components, except for ideal components, are based on two-port data any losses in the matching network is taken into consideration for the optimization.
It is also possible to optimize for data and memory data simultaneously. This is useful when finding a good compromise between different positions (e.g. open and closed positions for slide- or flip-phone).
Before any optimization can take place you need to:
Note
The minimum accepted power for a particular network is the minimum of the accepted power by the load for all selected frequencies. The network with the highest minimum accepted power will be taken as the best matching network.
The above describes the situation for pass-bands. For reject-bands it is the other way around: Optimization will be with respect to the lowest of the maximum accepted power into the load.
Note that this also means that at any boundaries where the pass- and reject-bands intersect the optimum accepted power will target 50% (-3dB). Therefore it is, in most cases, better to have some frequency gap between bands of different type.
Tip
It is possible place different weights for pass- and reject bands by changing the ‘Relative Output Power’ in the Source Editor .
When the necessary set-up is performed an optimization can be started by selecting the desired network topology from either the Optimize Menu or the Optimize Toolbar:

Optimize Toolbar
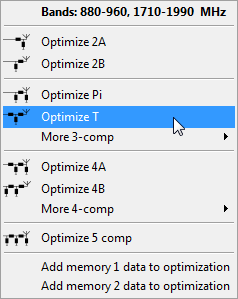
Optimize Menu
In the top of the Optimize menu the frequency bands that will be used are shown. Note that any overlapping frequency bands will be merged. This information is also displayed on the right side in the Status Bar.
In the menu and in the toolbar the most common layouts for 2-, 3-, 4- and 5-component can be selected directly. Under Optimize –> More 3-comp and Optimize –> More 4-comp all other possible configurations are available (see below):
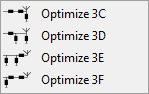
Submenu for more 3-component networks
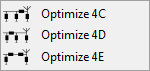
Submenu for more 4-component networks
This feature can be helpful when finding a good trade-off between different antenna environments. For mobile phones this could be for example: Free space vs talk position, open vs closed position for flip or slide phones, other positions where the user interacts with the device in various ways.
It is possible to optimize for data and any of memory 1 or memory 2. It is also possible to optimize for three curves by selecting data and both memory 1 and memory 2.
To optimize for data and memory follow these steps:
Optimization for data and memory can be set either from the Optimize Menu or from the drop-box in the optimizer toolbar. In the optimize menu there are two options to turn on optimization for Add memory 1 data to optimization and Add memory 2 data to optimization. In the drop-box there are choices for data only and any combination of data and memory 1 and 2.

Optimize menu set to optimize for data, mem 1 and mem 2.
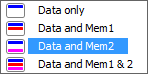
Drop-down selector for data and memory optimization
Note
When optimization is set to include one or both memory curves the option Add matching to memory (see Memory Curves) will automatically be turned on. Deselecting the curve for optimization will turn it off. However, he memory curves will not be automatically shown.